How to Remove Silence from a Video Automatically
Do you spend hours every week on the "jump cut" part of your video editing? Selecting all the little pauses and ripple deleting them?
It takes forever and it feels so repetitive, right?
Let's look at how you can automate silence removal using an app called Recut.
Automate Removing Pauses and Silences
Recut finds all the silent parts in your videos or podcast recordings, and lets you either export a new audio/video file, or export the cuts to your favorite editor. It saves a ton of time.
Here's all you have to do:
1. Open your recording in Recut
The app will find and highlight the silent parts in red.
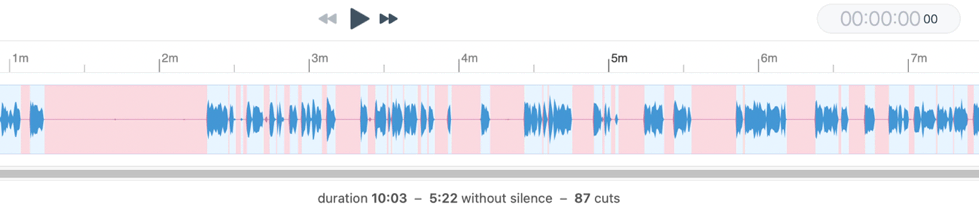
You can immediately hit Play and hear how it sounds with the silence cut out. It's fun, you can watch the cursor jump over the silent chunks in real time.
And then it's time for Choose-Your-Own-Adveture:
-
You might hear that the audible parts sound too tight together, or that the gaps are still too large. In that case, jump to Step 2 - Tweak the settings.
-
Recut may have chopped out some important silent parts -- like where you were typing something, or gesturing with the mouse. If you see any of that, jump to Step 3 - Manually Cut or Keep Some Clips.
-
If it sounds great and you're done, head to Step 4 - Export. Recut can export a new audio or video file, and it can also export the timeline of cuts to editors like Adobe Premiere, Final Cut Pro, DaVinci Resolve, and ScreenFlow.
Recut isn't a full-featured editor. It just does this one thing really well, and then makes it easy to export the cut list to the editor you use all the time.
2. Tweak the threshold, silence length, and padding
Recut gives you a few sliders on the right side that adjust how it makes the cuts.
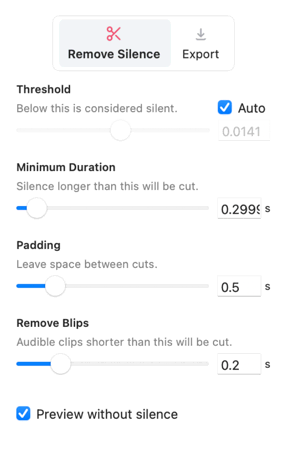
Threshold – how quiet is "silent"?
Threshold lets you decide what "silence" is. It's a number from 0 to 1, where 0 is totally quiet and 1 is a full-strength signal.
Any sound that's below the threshold will be treated as silence and might be cut (depending on the other settings).
When Auto is checked, Recut analyzes the recording and tries to pick a good default Threshold.
If your recording is very quiet or has low levels, you might find your words are getting cut off. Check out how to adjust the threshold.
Adjust the Minimum Duration
The Minimum Duration (in seconds) decides how long a silent segment needs to be before it'll get cut. Silence that's shorter than this will be left in, and longer than Minimum Duration will be cut out.
Why: if your recording has meaningful pauses that you want to leave in — say, lots of 1 second pauses — you can set the Minimum Duration to 1 second to keep those from being cut out.
Set the Padding
Padding tells Recut to leave some breathing room between cuts (or strip it out entirely).
With a padding of 0 seconds, audible clips will be butted up right against each other, and it'll sound like one of those fast-talker radio ad spots.
A padding around 0.4 or 0.5 seconds sounds pretty natural. Play around with it and see what sounds best to you.
One important thing: Recut won't add extra silence between clips to hit the padding number. It'll just leave silence that's already present.
The Remove Blips Setting
Remove Blips tells Recut to cut out audible clips that are shorter than the cutoff you set.
It's useful if you have little noises in the middle of otherwise silent parts, like a cough, or you bumped the mic while you were thinking of what to say.
You probably want to edit those out. Remove Blips does that automatically. Setting it to 0 effectively disables it.
Preview – with or without silence
The last thing on the sidebar is the Preview without silence checkbox which lets you toggle between how Recut plays back the file. When it's checked, Recut will skip over the silent parts. Turn it off to hear what the file originally sounded like.
3. Override Recut's Choices
Sometimes there's a quiet section that was meaningful: maybe you were showing something on screen, or pausing for dramatic effect.
Easy to fix! Just click on the clip and press Backspace.
On the flip side, sometimes there are audible parts you want to cut out, like mistakes and bad takes. You can fix those the same way: click on the clip and hit Backspace.
In the final export, the Red sections will get cut out, and Blue ones will be kept.
Drag, Multi-Select, and Deselect
If there's a few clips next to each other that all need to be cut (or kept), you can click and drag to select a bunch at once.
Notice how it only selects clips of the same kind as the one you started dragging from — so if you start the drag on a red clip, it only selects red clips.
You can hold Command while clicking to select multiple clips.
Clicking in the white area above or below the clip will deselect everything.
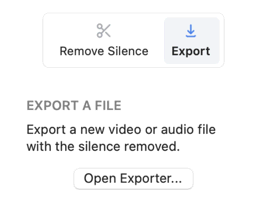
4. Export
Once you're done, there are 2 ways to export the result.
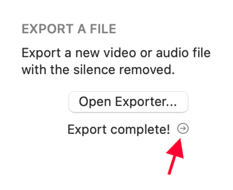
Export a New File (Audio, Video, or Both)
If the result you've got from Recut sounds good, you can export a new file from the Export tab.
It's usually best to leave the Resolution as-is, unless you definitely want to resize it.
The Preset is worth looking at if you notice that your export has the audio and video going out of sync. Occasionally the Fast setting will cause this problem. Try the "High quality re-encode" setting in that case (it'll take a little longer).
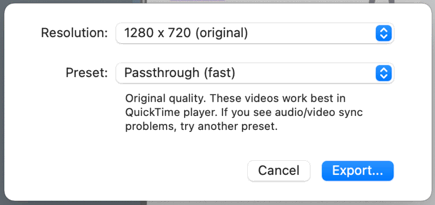
You can export just the audio part of a video by choosing the Audio only option from the Preset dropdown.
(If you're working with an audio-only recording, like a podcast, then the only options available will be the audio ones)
Pro tip: After the export is done, click the little arrow to open a new Finder window to where the file went.
Export the Timeline of Cuts
A lot of times, the rough cut is only the first step in the editing process. There's more work to do after that: adjusting colors, audio, maybe adding fades and zooms and lower thirds... lots of things that Recut doesn't do.
Recut makes it easy to export your timeline to DaVinci Resolve, Final Cut Pro, Adobe Premiere, ScreenFlow, or any editor that accepts XML or EDL files.
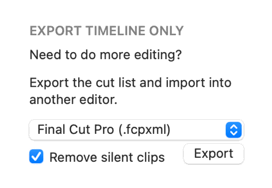
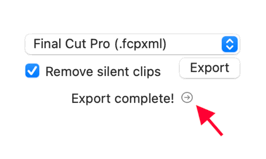
Just select your editor from the dropdown list and hit Export.
If, for whatever reason, you'd like to export all the cuts but leave the silent ones in, uncheck the Remove silent clips box.
Pro tip: After the export is done, click the little arrow to open a new Finder window to where the file went.
Troubleshooting
Words are getting cut off
If you find your words are getting cut off, the Threshold might be too high.
Uncheck the Auto box and manually lower the threshold until it "looks right". Here's how:
- Zoom in on the waveform (using the zoom control in the bottom-right or pressing the +/- keys)
- Reduce the Padding to 0, so that the silent parts are right up against the audible parts.
- Look for areas where the red "silent" region overlaps a part of the waveform, or gets too close. (That'll be where the words are getting chopped off)
- Drag the Threshold lower until the silent region doesn't overlap the waveform, and listen to it again.
Here's what that looks like:
Audio and Video are Out of Sync
If you're exporting a video from Recut and notice that the audio and video get out of sync, especially if it starts out fine but gets worse as it plays, then try to re-export with the High-quality re-encode setting from the Preset dropdown. It will take a little longer to export, but should fix any sync issues.
If that doesn't fix it, or if you're seeing sync issues with the timeline, there's a good chance you found a bug! Reach out to support@getrecut.com and we'll do our best to help.